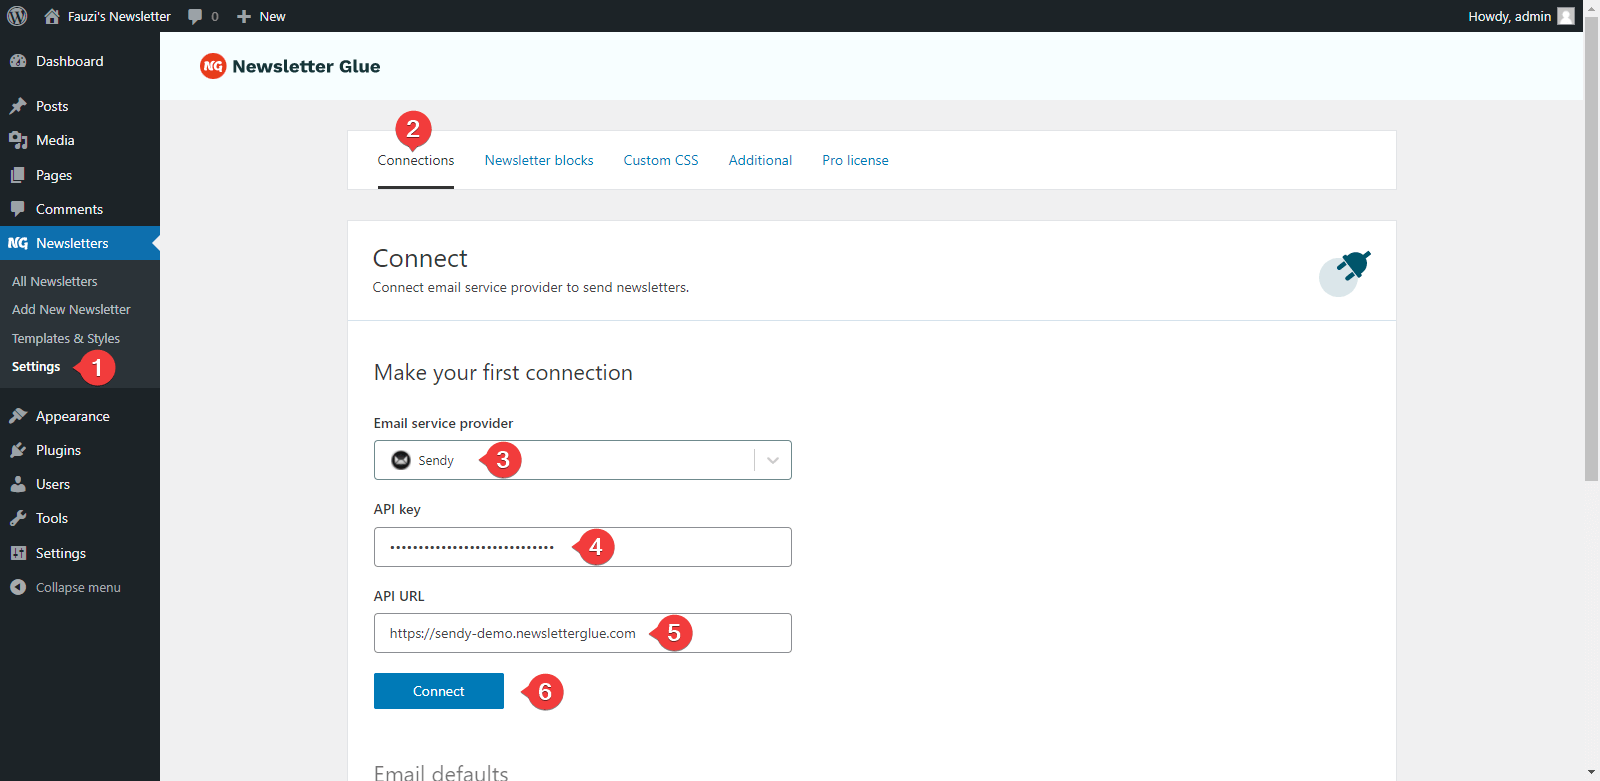
Before starting, ensure you have downloaded the exact file matching your specific receiver model and motherboard revision. Using the wrong firmware can permanently damage the device. Step 1: Connect the Hardware
Ensure your satellite receiver is powered via the rear switch or by unplugging the power adapter. Step 2: Connection and Device Manager Setup
The loader software is natively designed for Windows operating systems (Windows 7, 10, and 11). sunplus loader all in one best
: Essential for fixing receivers that have failed during an OTA update or are unresponsive, often referred to as "red light" or "boot loop" issues. Broad Compatibility
Click the , Browse , or File button within the loader interface. Navigate to your computer's storage and select your firmware file (usually ending in a .bin or .rom extension). Step 4: Initiate the Flash Process Before starting, ensure you have downloaded the exact
: A specialized "Force Flash" mode to recover receivers stuck on "Red Light" or "Load" due to corrupted software or power surges.
Ensure you download a verified version containing the ConsoleDown.exe engine. Exact Match Factory ROM Step 2: Connection and Device Manager Setup The
Offers adjustable communication speeds (typically 115200 bps) to ensure stable data transmission over serial lines.
Regardless of which all-in-one tool you choose, the general process for using a Sunplus loader is remarkably consistent. Here’s a typical workflow:
: Its primary "best" feature is the ability to revive "dead" or "red light" receivers that have been corrupted by bad software updates. It communicates directly via the RS232 serial port , bypassing the need for a working user interface on the TV.
Features distinct modes for Upgrade (writing firmware), Dump (backing up current firmware), and Erase (wiping corrupted flash sectors).